

How To Repair Styrofoam Molding
Foam crown molding is simple to install and looks just like wood molding! Learn everything you need to know about installing foam crown molding from someone who tried information technology.

One of the challenges of remodeling is the unexpected complications that come up along the manner. Today I'm sharing an awesome production that solved a big problem for us in our remodel. It's crown molding fabricated out of foam!
The trouble:
When nosotros first moved in, the whole upstairs was trimmed with a series of unlike sized wood pieces all nailed together to give the quasi-look of molding. Information technology really wasn't my style. It was poorly installed and even more poorly painted. It looked awful. Information technology was 1 of the offset things nosotros ripped out of our dwelling when we moved in.
The trouble is that removing the old "molding" (and I employ that term very loosely) damaged the ceiling and walls pretty badly. Information technology was going to be fashion, way, mode too hard to patch, so nosotros knew we had to add new crown molding to cover upward the damage.
But the problem didn't stop at that place. Trouble #2: nosotros take ceiling rut upstairs, which ways you absolutely
cannotnail into the ceiling for fearfulness of severing one of the heating coils and permanently disabling the heat system.
So we HAD to have crown molding, but couldn't nail crown molding upwards.
Grrrrrreat!
That'south when I started researching and came across Crown Molding Solutions. Their foam crown molding was similar in price to the wood nosotros would have bought, but is lightweight and made of foam, so you just glue information technology to the wall! Information technology was the perfect solution for united states of america!
So nosotros picked out a size and pattern we liked and in no time apartment, our molding showed upwards on our doorstep.
This is what information technology looks like:

It's the 4.v inch molding in fashion #4. Come across all of the styles HERE.
This is after we had painted it. I painted all of the molding before installing and that was definitely the right selection… much easier than standing on a ladder and having to tape off all of the edges.
The molding has a apartment back and top so that you have a surface for gluing.
To install, we practical LocTite Power Catch All Purpose adhesive to the flat back and acme parts and pressed the molding into place. Piece of cake peasy!

At that place's even a YouTube video that shows the installation procedure. Watch the tutorial Hither.
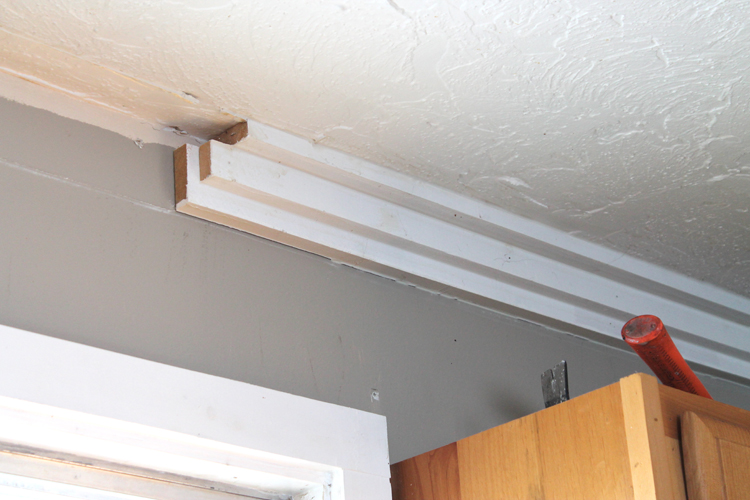
We still had to brand mitered cuts for corners, merely this stuff cuts so easily that we did a lot of it with a hand saw.
Besides, I just wanted to show the power of caulk. After installing the molding, the next footstep is to caulk the edges.

Yous can encounter in this photograph how much of a difference it makes:

Earlier caulk there are a lot of gaps, but after caulk, everything is smoothen and filled in. Caulk makes such a huge difference!
Here I am, balancing precariously on the arm of the couch and caulking up a storm:

I am so happy with how the molding turned out. It adds such a overnice finishing touch to the space. Here's the room earlier molding:

And here information technology is after:


The room looks so much more pulled together and finished. I honey the added character.

We decided to build our kitchen cabinets up to the ceiling to close off that awkward expanse that but collects dust, so my husband built boxes to fill in the space, and then we trimmed the cabinets with molding. Here's the "before" picture show…
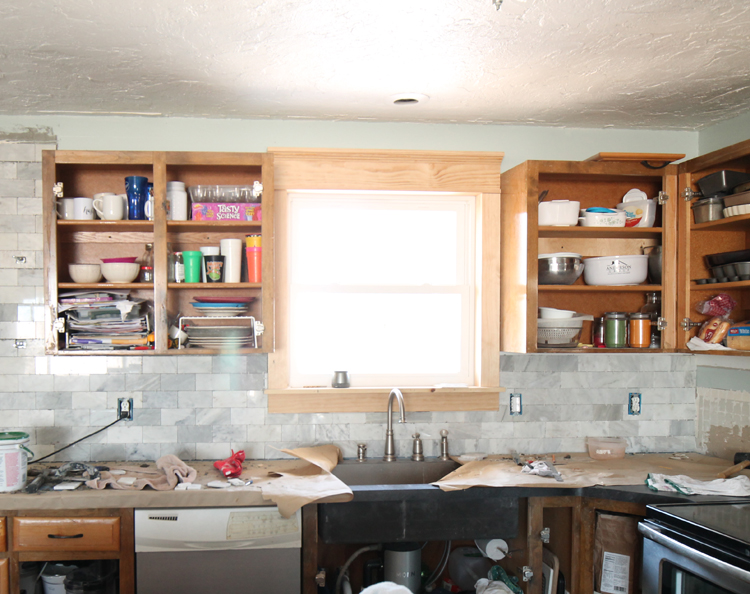
… and here's the kitchen after building the cabinets up and calculation molding:

Doesn't it look great?! The molding adds so much drama and makes the whole kitchen look custom. Obviously nosotros're not done working in the kitchen… nosotros yet have cabinet doors to build and need to pigment the cabinetry, but it'south a great start and I'm so pleased with how things are coming forth.
Here are a few things you lot might want to know if you're thinking about installing cream crown molding in your dwelling:
- Cream molding is a great option for people who are uncomfortable with using power tools. Y'all could install molding in an entire firm with only a hand saw.
- The molding comes unpainted. Start with ane coat of primer, and so two coats of semi-gloss latex paint. I used an angled brush, merely if y'all take a paint sprayer, it would work well for this job.
- Because it's cream, the molding is very lightweight, so installation is easier. Even my kids could lift an entire 8 foot section of molding in a higher place their heads.
- One time it'south installed, foam crown molding looks just like traditional wood molding. I seriously tin't tell a divergence.
- You exercise have to be careful not to paring the foam during cutting and installing. It's soft, and then if you push likewise hard on it or press tools into it, it will go out indentations. It'due south non a big deal… just something to be aware of.
- If the thought of cutting angles scares you, you tin purchase pre-made inside and exterior corners! No mitered cuts needed… just install the corners, then caulk all of the seams. Talk about elementary! The pre-made corners are available HERE.

How To Repair Styrofoam Molding,
Source: https://www.thecraftpatchblog.com/everything-you-want-to-know-about-foam/
Posted by: sturtevantsoliften.blogspot.com
0 Response to "How To Repair Styrofoam Molding"
Post a Comment